


Thank you to my sort-of sister in-law and friend for taking these awesome pictures!! I just added the antique look to them :o)
Thank you to my sort-of sister in-law and friend for taking these awesome pictures!! I just added the antique look to them :o)
So I just started trying to make these little silver accent balls for my jewelry. Some tricks and lessons learned:
Use fine silver, not sterling silver. Take any leftover fine silver bezel wire and melt those down into balls. Try to keep the strips you cut the same length. If you make the balls too big they have a tendency to collapse in on themselves and not create a nice round ball. If you want the balls to be flat on one side solder them on a flat surface. However, if you would like your silver balls to have a perfect spherical shape you can dig out a little hole in your soldering block, this will keep the silver from forming a flat side.
Adhering the balls to the surface is just that easy, file one side of your ball so it has a flat surface to sit on, otherwise it may roll on you during soldering. Place a small piece of medium solder under your ball and heat. Easy as that!!
key take aways:

So etching the base metals is very similar to etching sterling silver, the only major difference is the chemicals used. The chemical used for etching base metals is Ferric Chloride.


This is a picture of an angels wing I am working on, terrible lighting, but you can see the detail of the design and how it is stuck on. The vinyl is like a lite sticker, peels off clean!
So many of you on Facebook have been asking about how I do this so I thought I would share in more detail here. I hope you find it useful.
I will start off by saying, for etching sterling silver I use Ferric Nitrate. You can buy this from The Science Company online usually in 500grams or more. When you get it you have to mix it with water to make the solution, probably fairly obvious I know ;o) I don’t have a solid recipe that I use but I will say I use about two cups of warm water to about 1 cup of crystals. I have a magnetic stir plate that mixes the solution for me and agitates it while I etch. You just place a magnetic pill in the solution and the magnet inside the base plate rotates, rotating the pill and mixing the solution. It is extremely handy and I believe can be purchased on Rio Grande but it wouldn’t hurt to check Craigslist or something.
Once the solution is mixed your ready to prep your piece. A lot of places tell you to use permanent marker or even wax to create designs but I find that the marker comes off very easily in the solution. Roughing up your surface a little might help with the marker but then you have etched texture (which may look cool) from the rough surface. I prefer to use some kind of sticker. It adheres really nicely to the surface and it gives me a nice clean edge when I etch. You can find stickers of all different kinds at your local craft store, or you can buy some vinyl and cut out any shapes you want. You will be super happy with the results.
Depending on the strength of your etch, if its fresh I usually leave it in for about 1 hour to start. When you take it out to check it you may have to gently wipe away some of the silver that has etched on the surface but has not fallen off. Rinse and check it once in awhile until you achieve the desired depth. When you are happy with the etch, remove the pattern and wash the piece with a soft tooth brush and dish washing liquid like Dawn. I don’t recommend that you use the tooth brush for anything other then cleaning your pieces from that point on ;o)
some quick tips:
Well look, if I’ve missed something don’t hesitate to add comments or ask questions :o) Thanks guys! I hope this helped and happy etching!

I am going to start posting metal jewelry techniques for all of my followers. I may not know everything but I know some things :0). Upcoming posts will include etching different metals, stone settings, finishes, etc. if there is something you would like to learn or know let me know I will post my experiences. I think it’s great to have a community of resources to learn from. A lot of people get offended when you ask questions about their techniques but I think that’s lame. We should want to share techniques….no one can steal your ideas and style!
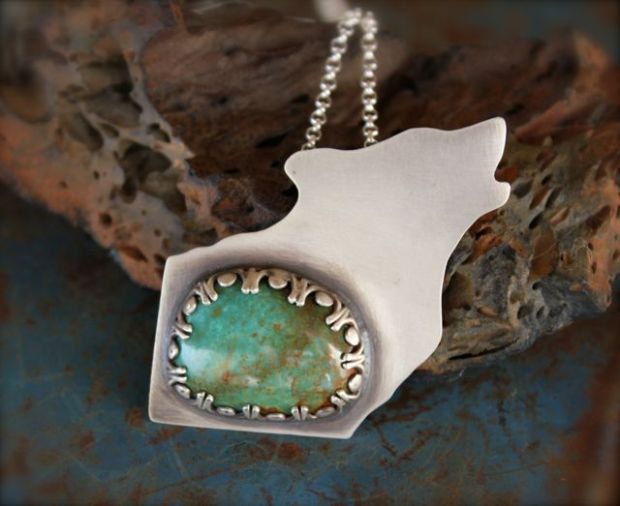
This is a howling wolf design, inspired by native american culture. The wolf is adorn with a beautiful turquoise stone.
